Showing posts with label crafting. Show all posts

Sunday, September 30, 2012

Last Sewing Project (for a while, anyway) -- a Bed for Nathan's Baby

Hi there!  We're still waiting for Baby #2 to make his appearance (he's five days late and counting!), so I gathered up all my spare energy and used today's naptime to start (and finish!) one more sewing project.

You might remember the doll I sewed for Nathan from the Winter 2011-2012 issue of Living Crafts magazine.  I made it with the intention of Nathan having his own 'baby' to tend to while I tend to our Baby #2.  But like most of the toys I lovingly make myself, this one didn't really grab his attention and got little use. 

I can't blame him, really.  He's a boy who loves trucks and cars and all things boyish, and he'll probably grow up to be a man's man, like his father.  (Does that make him a boy's boy now?)  Also, back then I don't think he grasped the "we're having a baby" concept.  But now he does, and he started playing with the doll a litlte bit and added him to his core group of "guys" (stuffed animals) that make up his bedtime menagerie.  He even said recently, "Soon I'm going to have two babies!"  Almost made my heart melt.

So I thought I'd make the baby some accessories so Nathan can actually do something with his own baby while I tend to mine -- I made him a bed with a sheet and pillow.  And he loved it!!


Naptime for baby!

Put him somewhere good for safe keeping.


Naptime's over!
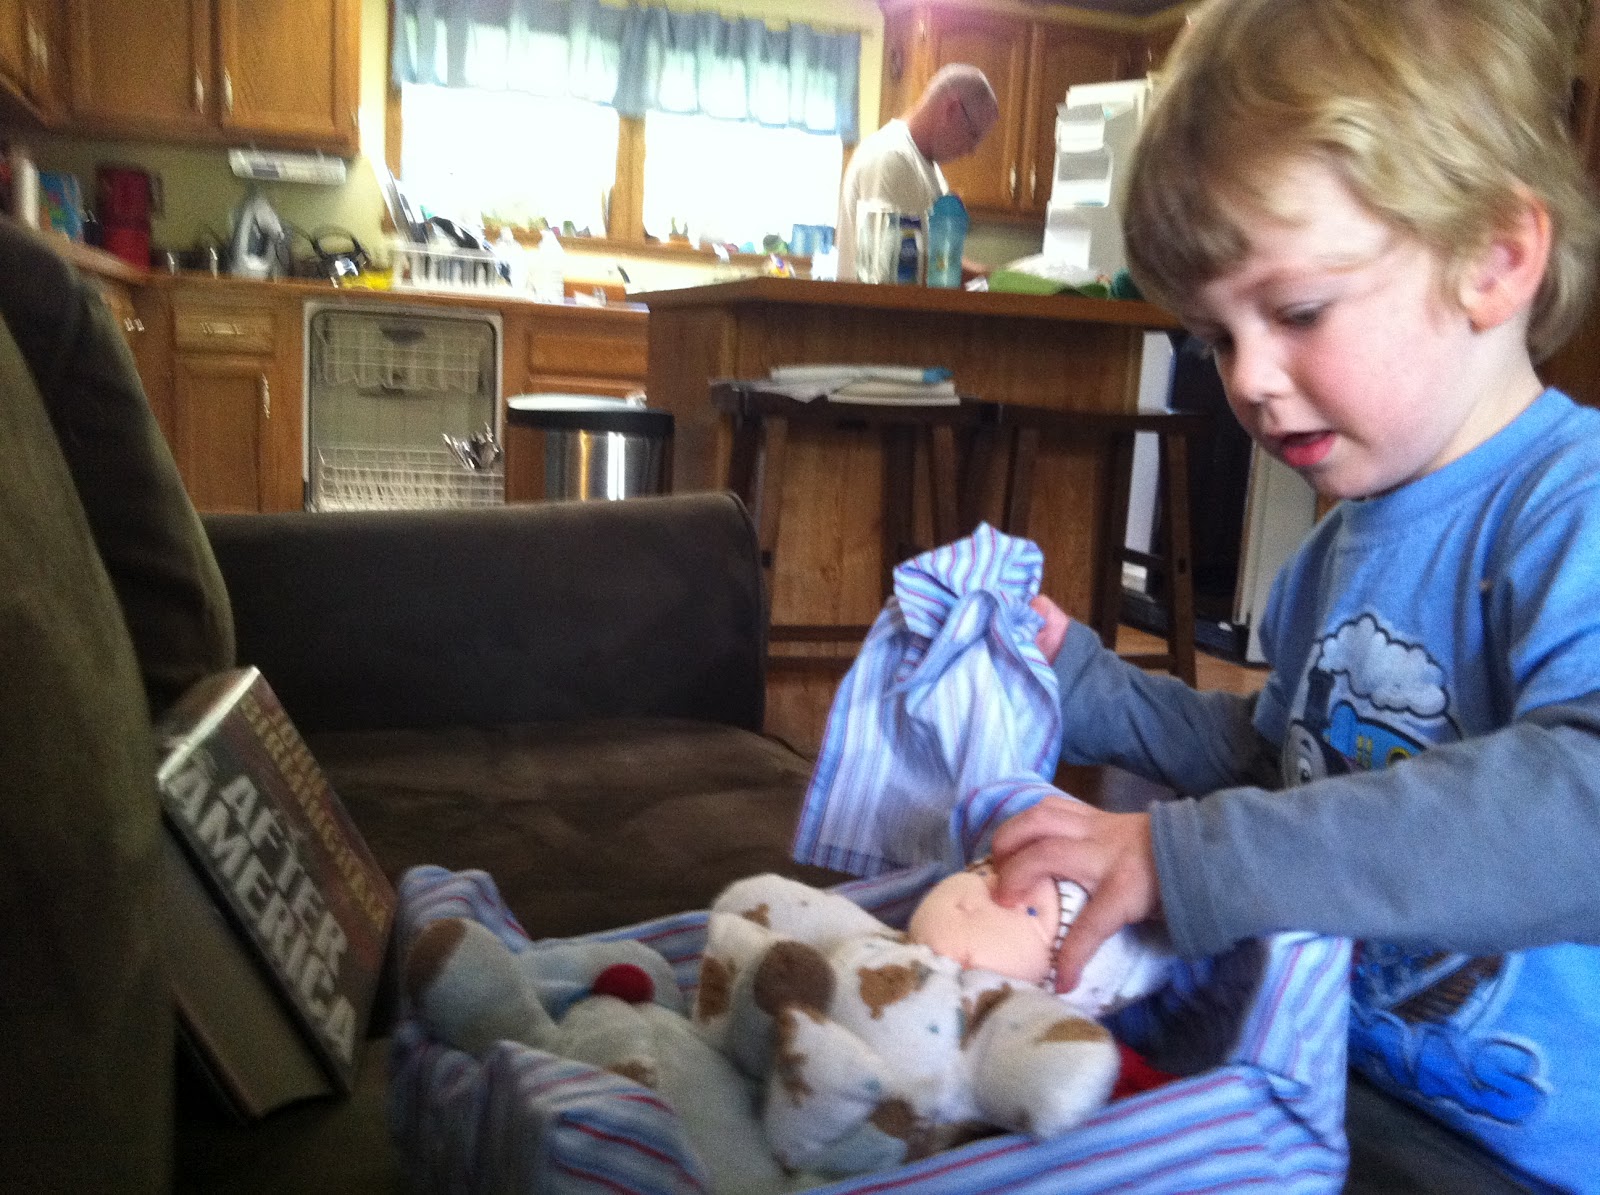
Time to get grabbed in the face!

It's bedtime now!

Tucking him in.

Happy boy.

Good night kiss for baby.

He's actually reading him a bedtime story!  I love how this sweet boy pretends.  I love this sweet boy!


After a few minutes of putting the baby to bed and then "waking him up," Nathan asked for clothes for the baby to wear and for some diapers.  So next I'll make some felt diapers with velcro closures and will try to figure out how to quickly make some clothing for Nathan to throw over the doll's perma-jammies.  I don't think I have time to knit something, yet don't know when I'll have the energy to lug out my sewing machine again and wrap my brain around another custom-designed project.

I wish I'd taken better photos of the bed, sheet and pillow while we had daylight.  I tried hard to make the sheet look like a real sheet, although I added some topstitching for extra detail.  The striped fabric (from a hand-me-down crib sheet) made it easy to press hems without having to measure, and I eyeballed the size of the sheet and pillow.  I even machine sewed the pillow shut after stuffing it, instead of dreaded hand-sewing.  I love how it came out!

The bed itself is a cardboard crate from Cuties brand clementines.  I wrapped a piece of sheet around it and neatly folded and hot glued the edges onto the bottom of the box.  I wish now that I'd also secured the fabric inside the box,  but I think the fact that I didn't makes it look more cosy and bed-like and less cardboard-box-like. 

I love saving things to use later in crafts (like the clementine crate) and being resourceful with the materials I have on-hand (like the hand-me-down crib sheet I never used because the colors didn't match Nathan's room).

I'll try to feature the baby's diapers and clothing, if I ever get around to creating them before the real baby gets here.... and I haven't forgotten about my last installment of the baby's nursery before the big reveal.  I'll try to do it very soon!

Sunday, August 19, 2012

Nursery Sneak Peek: Lamp Before and After

Today we're back from the beach, a long weekend away -- our first family vacation, in fact!  Now that the craziness of packing, then relaxing, and then repacking (and sorta unpacking) is done, it's time for me to get back in Baby #2's nursery.  I'd better finish what I've started before he makes his big appearance (in just five weeks, give or take!).

For the nursery, I scored an inexpensive lamp and shade from Target that go perfectly with the green backdrop of our nature theme. I found that the plain white lamp shade was fading into the background, and at first I thought that was okay.  After all, your eye needs a rest every so often, and I seem to be packing this baby's room with more stuff than I did Nathan's room.


But then I got an idea....  Cover the shade with one of the softer coordinating fabrics from the pennant banner, like the yellow one.  And then I got a better idea: Trim the lampshade in the same fabric as the curtain, which also appears in the banner.  A-ha!


I love how it turned out.  The vibrant colors and fun, cheery, irregular striping just make me happy, and the lamp no longer fades into the corner.
So, how did I do it?  I simply cut two strips of fabric one inch wide by lengths long enough to wrap around the shade.  I folded it in half lengthwise, right sides together, and sewed a seam with a half-inch seam allowance resulting in a half-inch-wide tube.  I trimmed the seam allowance to a quarter inch, turned the tube right side out and pressed it with the seam in the back. Viola!

Then I used Thermoweb self-adhesive sheets to adhere the strips to the lamp.  It was almost too easy, if you ask me.  Especially for this great result!

Since the lamp photos are a bit dull, here are a few other inexpensive Target finds that fit right into our color scheme:

The bear in the blue shirt is from Babies R Us (not Target). Allen wrench not included!


Stay tuned for more nursery-themed posts.  I want to get this room finished within the next few weeks and will then do a big reveal.  Can't wait!

Wednesday, August 8, 2012

My New (Old) Love, Embroidery & Some Birdies for the Nursery

I almost titled this post "My New Love, Embroidery," until I remembered that embroidery was how I began my foray (descent? downward spiral?) into the needle arts. So that actually makes it my first crafting love.  As it turns out, embroidery was my first creative endeavor as a grown up.  Like, 9 nears ago when I was 23.  How many 23-year-olds do you know who are into embroidery?  Yup, I'm a trail blazer and clearly ahead of my time.

Of course now I'm 9 years older and a smidgen wiser and I've branched out and become hooked on knitting and, recently, sewing.  I also threw in a touch of punch embroidery and some haphazard crochet, as well.

And it appears I've come full circle and I'm back to loving embroidery again.  Embroidery offers me a different kind of relaxation than knitting.  It's easier, for one, and less monotonous, to a point.  Constant color switches keep it light and interesting, projects are more portable and I don't have to do any counting. (Yay!) Except when it comes to counted cross stitch. But that's a whole other story.

On to the New Nursery Sneak Peek!


I recently finished embroidering some scandanavian birds for our new baby's nursery. The pattern is Scandinavian Birds II from the sweetest Etsy shop, The Split Stitch. (I can't link directly to the pattern because once someone buys it the link won't work anymore.)  I love Sara's embroidery patterns and just purchased a sewing pattern from her, too -- and I'm almost already finished!


I love how sweet these little birdies are. And the colors were fun to choose, too.

In what might be considered sacreligious fashion, I cut and hot glued the evenweave fabric to the hoop (I know) and then wrapped the hoop with strips of coordinating fabric as per Allison's tutorial on her blog, Little Lovelies. I'm very happy with how it came out and plan to make another piece or two from this same pattern for the baby's room, and someday for mine. (The pattern gives you several more birds to choose from than the ones you see here, and in several different sizes and orientations.  What a great deal!)

Don't you just love it?! 


Stay tuned for more from our baby-to-be's nursery, coming soon... I still have lots to show! 

Tuesday, July 24, 2012

Nursery Sneak Peek & Fabric Pennant Banner Tips

I've been diligently working on getting our new baby's nursery ready. Room painted, check. Dresser delivered, check. Carpet installed, check. Now it's time to decorate!

I'm making a lot of my own touches for his room, but it all began with this Treetop Friends bedding set and wall decals.  I love the design, and it goes well with the nature theme I had planned before I even knew if baby was going to be a boy or a girl.  (It's a boy, in case you missed it.)

Little by little I'll showcase each handmade element in the room and then I'll do a big reveal of the whole nursery when it's complete.  I'll start with the fabric pennant banner.


I took a piece of the bedding set with me to Joann and picked out patterned fabric in colors to match, plus a striped fabric that I will use to make a curtain (more on that in another post). I incorporated the striped fabric into the banner so it all ties in.  I love the patterned fabric choices, if I do say so myself.


In typical Kelly fashion, I winged it and didn't use a pattern....and I love how it came out!  There are so many pennant banner tutorials out there that I'll spare you one here, but instead maybe I'll cough up some of the tips I discovered along the way, since I pretty much made this thing up as I went along.
Here we go!

Fabric Pennant Banner Tips
  1. Create a triangle template out of lightweight cardboard, such as a cereal box. Here's where you get to decide on the type of triangle you're after. Isosceles? Equilateral? I went with isosceles for a traditional look (two sides are of even length). When you measure and cut your template, be sure to account for seam allowances -- I made mine a quarter of an inch.
     
  2. Fold your fabric up right sides together so you're cutting at least four triangles out at once (more folds = more triangles = less individual cuts). A rotary cutter, ruler and mat are must-haves for this project.
     
  3. Since you cut your triangles with the right sides together, it's now much eaiser to pin and sew them. Any minor ndescrepancies in size won't be problematic while pinning.
     
  4. Sew your seams a quarter inch from the raw fabric edges, trim allowances near the main triangle point and turn triangles right side out.  I've found that a bodkin helps speed up the initial turning of the point, and, of course, a point turner gets you nice, crisp points. Sewing them in the color order in which you plan to arrange them later will shave a few seconds off your overall time.
     
  5. To easily press your seams flat, insert your cardboard triangle template into your fabric triangle before pressing. Talk about easy pressing!  I barely had to fuss with a seam to get it to sit right before pressing.
     
  6. Buy more double bias tape than you think you'll need. Unless you like making extra trips to the fabric store.  Apparently I do.  I used this tutorial for sewing the piece of bias tape together.

Stay tuned for the rest of the handmade items in our new baby's nursery!

Thursday, February 23, 2012

Pinned It, Did It! #1

Inspired by Allison at Little Lovelies, I'm starting a series of posts where I share crafts or recipes I've pinned and actually done.  (Thanks, Allison!).  Ever since I'd joined Pinterest I hadn't actually made anything I'd pinned -- or if I did, I just can't remember.  And if you read my last post, you know how badly I'd been neglecting my Pinterest account. But now that that's all straightened out, I'm happy to share my first Pinned It, Did It!

My thanks again go to Allison for this really great embroidery handprint keepsake tutorial.  Is this not the cutest thing you can make to remember your child's cute little hand?  I can't wait to hang it.


I love using coordinating fabrics.  I bought both of these at JoAnn's from the Lisette line.  I'm sorry for not knowing the exact name of each.

This break from knitting to make a project that's fast and rewarding and just different from what I'm used to doing was so refreshing.  I can't wait to complete another pin -- last night I began making my first doll ever (pin).  But if you follow on my Facebook page you already knew that... right?


Thursday, January 12, 2012

Pin It and Do It!

I've been itching to do a craft lately (you know, other than knitting), but for some reason I don't have any great ideas (how did this happen?). So with some inspiration from Allison at  Little Lovelies (one of my favorite blogs), I turned to my Pinterest boards.

Allison at does a weekly feature called Pinned it, Did it and she's inspired me to take a closer look at my pins and actually make something.  The only problem is that I haven't pinned very many things (doh!) thanks to my dwindling time spent surfing the web and pinning what I find.  And some what might seem like excessive knitting.  (It's not.)

Truly, I'm not a pin-aholic.  I don't think I use Pinterest the way I'm expected to.  I don't search through the pins and get addicted to Pinterest -- I just use it to pin things I want to make in the future.  You know, like a real bulletin board.  And I'm pretty selective about what I want to and think I'll actually make.  Just like in my real life, I'm minimalistic in my online life, too.  (I'm the type who has an urge to save papers and tear things out of magazines only to have them sit around for a long time and then eventually get thrown out.  So now I just cut to the chase and throw things like that away as soon as I'm done with them--which is why I think Pinterest is so great....keep my clutter on the web!)

I had hoped to make something quick and easy tonight to get back into the crafting thing -- after all, my crafts are one of the main reasons I started blogging in the first place -- but I didn't have all the supplies I need. 

This is what I want to make, except on a really tiny scale.  I recently found the cutest little pinecones I've ever seen!


I also want to make this:

Pinned Image

(source: Grow Creative)

I guess they'll just have to wait until I have time to buy the supplies.  I'm not sure when I'll get a chance to actually use spraypaint, anyway!  lol  Probably never, but one can dream on Pinterest, right?

Thursday, December 1, 2011

New Knitting Pattern & Craft Tutorial in ROTH!

Hey everyone!  I hope you'll check out my latest free pattern, Thermal Textured Socks, debuting today on the winter edition of Rhythm of the Home!  But it's more than just a pattern, it's a sock-knitting tutorial that demystifies sock knitting and explains the anatomy of a hand-knitted sock.  The pattern provides lots of extra details and photos to guide you through each step.  If you haven't tried knitting socks yet, this is definitely a great place to start.


The pattern is written in both women's and men's sizes and can be knitted plain (for beginning sock knitters) or with the optional texture pattern for more advanced or adventurous knitters.  I hope this tutorial and pattern show you that sock knitting is much easier than you may think.


Also, check out my Four Seasons Nature Box tutorial.  It's a great craft to do with kids, plus it nets you a convenient place to store all the fun things you and your kids bring in from outdoors.  (There's nothing quite like a walnut underfoot when you're not expecting it!)  Plus, maybe it'll inspire you to get outside more this winter.  I especially enjoyed the decorating one side of the box for each season.  I hope you do, too!

I'd love it if you'd come back here to tell me what you thought of either or both tutorials.  Thanks for reading!

Sunday, July 10, 2011

Decoupage Leaf Vase Tutorial


I really enjoy giving away cut flowers in the summertime.  I always have lots of daisies to share and usually zinnias, too.  They make a great hostess gift, and unlike bringing snacks or desserts, you don’t have to worry about food allergies or bringing fattening food into someone else’s home!

But I run into trouble when trying to decide what to put the flowers in.  My vase supply dwindled after my first summer of big-time gardening, so I resorted to glass jars I saved from food, like pickles.  My husband tried to tell me this was tacky, but I can’t give away all of my vases!  And I can’t just keep buying more of them.  (I do try to keep a lookout for inexpensive vases in thrift shops, but I usually find a lot of bud vases, and I like a vase with a wider mouth.)

So I try to save jars of interesting sizes and shapes and decided to make them look more intentional—and decorative—by decoupaging them with pressed green leaves. 


I’ve found that pressed fresh, green leaves are more flexible and less brittle than pressed fall leaves, which are already brittle at the time they’re picked.

My jars are on the small side, from artichoke hearts, sweet peppers and capers, so I picked smaller leaves in early summer for pressing.  The bigger your jars, the bigger the leaves you can use, so go crazy!  I’ve found that leaves from maple, Indian Cigar and mulberry trees press well when green.  I tried red oak, and they weren’t as flexible and easy to work with for this project.

Tip: Need help getting sticky labels off your jars without using harsh chemicals?  Try Brillo pads, the ones with the soap already in them.  They work like charm!

Here’s how you can make your own decoupage leaf vases:


1. Gather your jars, pressed leaves (fully dried), ModPodge Gloss or other decoupage medium, sponge applicator and a pair of scissors.  You’ll probably want to protect your work surface with newspaper. With the scissors, snip the stems off your leaves—I found the stems are too brittle to bend along the sides of the jar.


2. Work with one jar at a time.  Cover the jar (or half of it, if you prefer to work half a jar at a time) with ModPodge.


3. Press a leaf onto the still-wet ModPodge to make it stick to the jar.  Smooth it out to prevent any air bubbles, gently pressing down on all areas of the leaf, especially the edges.  Place as many leaves as you like around all sides of the jar.


4. Repeat for each jar, allowing the jars to dry completely, for about 15 minutes.


5. Once dry, cover the jars and leaves with an even coat of ModPodge and allow to dry for another 15 minutes.

6. Once that coat is dry, add another coat of ModPodge to better protect the leaves.


7.  Once dry, fill with water and add your favorite cut flowers!

I like mine so much that I’m afraid I’ll have trouble parting with them.

Wednesday, June 29, 2011

Crafting on a Budget

With the cost of everything going up—groceries, gas, electricity, I mean everything—and salaries staying relatively the same, we’ve been looking for ways to tighten our proverbial belts lately.  The good news is not having a lot of money to spend on crafting supplies doesn’t mean you can’t afford to craft—that is, if you know how to craft on a budget.  This topic has been on my mind a lot lately as I scrimp and pinch in some areas (I can be a cheap-ass) in order to spend (or splurge) in others.  Here are some of the common-sense strategies I use to keep crafting affordable yet still creative and fun.

Find money in your pocket? Stick it in a jar. This strategy really works, even if you’re only saving in five-cent increments. The best is when you find a ten-dollar bill in your pocket—don’t put it back in your wallet for convenience store crap or over-priced half and half, stick it in your jar.  The same goes for coins you get back as change—take them from your purse or pocket and deposit them right into your jar when you get home.  Treat it like found money and spend it guilt-free.  Make a deal with yourself that you’ll only spend the money on crafting supplies when it reaches a certain limit; mine is $50.

Do you know why my limit is $50?  It’s because that’s how much you have to spend at knitpicks.com in order to get free shipping.  Why spend money on shipping and handling fees when you can spend that money on yarn instead?

I almost always buy my yarn from Knit Picks’ catalog/website. That’s right.  I don’t need super-expensive yarn in decadent fibers and colorways in order to enjoy my craft.  I knit to knit, moreso than to obtain a finished object (after all, one can just go to the store and buy a hat, right?).  I’ve been buying yarn from Knit Picks for so long and from so early on in my knitting career that I actually haven’t experienced many of those expensive yarns, so I really don’t know what I’m missing (I think not much, but who knows).  I like the fibers, colors and feel of Knit Picks’ yarn, and they keep coming out with new and interesting yarn and colorways.  They’ve come a long way since I found them in 2005, and until they do me wrong, I’m going to stay a loyal customer.  The prices are right!

Find change lying around the house?  Put it in the aforementioned jar.  The change I find lying around usually belongs to my husband, and I started confiscating it years ago when it really annoyed me that he leaves his stuff laying around (it’s more than just a few coins).  I was surprised when he started noticing the disappearance of his spare change, and it eventually motivated him to pick it up and put it in his own jar.  (Damn!)  But he isn’t always so neat, and after a few days on the dining room table or baker’s rack, that change is mine.  I don’t think I would take Nathan’s money it if was lying around, but he’s not old enough to have his own pocket change yet.  And when he is, I hope he’ll save it up in his own jar, just like his mama.

Make a list of your crafting supplies and let the list grow before you go shopping.  It’s hard to stick to a budget when you buy your crafting supplies one at a time, but when you make fewer trips with longer lists the costs are easier to keep track of.  Also, when you have a long list, you’re less likely to buy things you really don’t need.  P.S.: Don’t forget to bring the list with you to the store.  I, um, sometimes forget, which defeats the whole purpose.

Have a plan.  If you’re in the craft store and you want to buy something that’s not on your list, be sure you come up with a plan for it and can really use it.  It would be silly for me to say not buy something that’s not on your list in a craft store (although that’s my general policy for staying on-budget in non-craft stores)—it’s one of the best places to get lightening bolt ideas and formulate awesomely creative plans in the blink of an eye.  So when you do come across something great that you didn’t expect to buy, be sure you have a plan for it before you leave the store, even if it means buying one or two more things for the project before you leave.

Get reacquainted with your stash.  Go through your stash of crafting supplies every few months to remember what you have.  You’ll be surprised about how many items you’ve forgotten about; I did a recent sweep of just my yarn alone and found lots of yarn—and nearly finished projects!—that I had forgotten all about.  It’s astounding, really.   Maybe you’ll get some new ideas to use up the supplies you have and postpone a trip to the craft shop.

Be resourceful.  Save crafty or otherwise useful items you think you’ll be able to use in a craft, but do so sparingly.  Before I throw something away, I ask myself, Can I really use this?  Often times the answer is no, but sometimes I get a yes.  I don’t want to become a hoarder, so if I can’t immediately think of a possible use for an item and it’s not particularly special, I chuck it.  The special ones, like my Huckleberry tea tin from our honeymoon in Yellowstone, are worth saving even without a plan.  I saved a faux leather box from my husband’s wallet to make this awesome photo box for his Father’s Day gift. 

That’s all I have for now.  If I think of any other ways to craft on a budget, I’ll write another post—maybe it’ll become a series!

Thursday, May 26, 2011

It's Only Temporary

This afternoon while Nathan napped I set up a temporary pottery glazing station by the window in the dining room, since my craft room has become crowded with boxes and boxes of baby clothing we evacuated from Nathan's closet during the great washing machine flood of 2011.


I glazed my toadhouse in relative peace with the sole company of a glass of iced coffee.  Glazing pottery is so relaxing, and I enjoy it so much more in daylight than I do by incandescent light at night.  I also glazed two lady bug pendants that I'll string on some black hemp cord.  I'll take before- and after-the-kiln photos so you can see how amazing the firing process is.


These are the buttons I got back from the kiln this week.  I don't know what I'll knit someday to go with them, but I'll think of something that only requires five large-ish buttons.  I also got back two small plates from the kiln, but I don't really love them so they're nothing to write home about.

My little glazing station is only temporary -- I'll have to pack it up before I go to bed at night, lest the cats knock things over and destroy my totally cool, garden-worthy toadhouse.  (T.J. found me a toad last week -- I hope he sticks around long enough to move into the condo!  Even moreso, I hope he is a she who will have babies!)  (Sidenote: The cats are on my last nerve -- they're lucky they still live inside the house.)

The stations' temporariness (it's a real word, I checked) made me think about how the chaos of this week is also temporary.  Of course it was made worse by cats who can't seem to find the litterbox when there's a little chaos in the house.  (Did I mention that I've about had it with these cats?)

Soon we'll have a new washing machine, the house will be back in order and hopefully Nathan's carpet will be dry and non-smelly.  And you know what?  Even if the capet has to be ripped out and replaced, it's just carpet -- it won't be the worst thing that could ever happen to us.  Eventually the boxes will leave my craft room-slash-office and return to Nathan's closet.  Maybe we'll come out of this as good as new.  Either way, just like my dining room glazing station, this situation is only temporary.  Thank God.
Related Posts Plugin for WordPress, Blogger...